Development of a New Computer Aided Manufacturing System for Variable Pitch Screws Fabrication
Copyright © The Korean Society for Precision Engineering
This is an Open-Access article distributed under the terms of the Creative Commons Attribution Non-Commercial License (http://creativecommons.org/licenses/by-nc/3.0) which permits unrestricted non-commercial use, distribution, and reproduction in any medium, provided the original work is properly cited.
Abstract
The study focused on the development of the CAM system restricted to the fabrication of variable pitch screws by using turning centers. To develop the dedicated CAM system at a low cost, open source programming language was used as much as possible. A commercially available 3D-CAD system was used to model variable pitch screws. The edge data of the variable pitch screw was extracted from 3D-CAD data of the variable pitch screw, and then a number of the edge data were copied by the amount of feed in the longitudinal direction of the screw to make a cutter path. The successive cutter path was repeatedly generated by reducing the size of the edge data. The advantage of this method of generating the cutter path is very simple and easy to use, compared with the conventional CAM systems. During the cutter path generation, the system can detect the collision between the cutting tool and the workpiece. As a result, the validity of the developed CAM system for variable pitch screws fabrication was confirmed from several examples of the cutter path generation.
Keywords:
CAM, Screw, Lathe turning, Tool paths1. Introduction
As the use of 5 axis control machining centers and multi-task machines progresses, it is becoming possible to efficiently generate NC data with complicated and effective tool movements on a computer using CAM system.1 In recent years, due to the diversification of user's needs and complicated processing, the necessity of CAM system is more increasing, and its presence and importance are further growing.2-4
However, the CAM system currently on the market is trying to conform to various processing needs, so that a wide variety of functions are integrated in one software. Therefore, the operation becomes complicated, which makes it difficult to master it. Furthermore, the incorporation of a variety of functions makes the software bulky and it also increases the specifications required for PCs to use it.
Incidentally, there is a functional part called a variable pitch screw capable of changing the movement amount with rotation. For this production, macro instructions were prepared, NC data was generated using the macro, and turning operation was done with NC lathe. However, it takes time to create a macro, so it is inefficient for creating NC data, and it has gradually been replacing to milling. In milling, the creation of NC data by use of the CAM system can be made easily and quickly, so it was possible to omit the trouble of creating a macro over time, but milling operation is more time-consuming than turning operation, which is advantageous in terms of the surface roughness.5
Taking these backgrounds into consideration, this study aims to develop a CAM system to automatically generate NC data for variable pitch screws fabrication. As already mentioned, many CAM systems on the market today are consolidated in one software, many operations are complicated, and specifications required for PCs are also increasing. It is a serious problem for users who use only specific functions. Therefore, the study aims at developing CAM software dedicated for the variable pitch screw, that can be used simply by eliminating complex and troublesome operations and settings.
2. Development Policy
In this study, Python 2.x system, which is an open source programming language, is used for development of CAM software. Python is a language that is highly readable, generic to use, and is also used for machine learning and deep learning. Python has numerous packages that summarize mathematical processes, and the development is proceeded by using many modules also in this study.6 Among them, NumPy is a representative module, dedicated to multidimensional array, and is also used in this study.
One author has already developed the base of CAM software written in Python (Named ChubuCAM), and basic functions are prepared as modules such as the tool path generation in the direction of each normal vector of the XYZ axes and the detection of interference with the CAD model of the tool. In this study, based on the Python module, the development is proceeded by adding new functions to ChubuCAM. The specifications of the PC used for development in this study are as follows; OS: Windows 7 Home Premium (64 bit), CPU: Intel® Core™ i7-4790 3.60 GHz, RAM: 16.0 GB. Moreover, in this study, Spyder is utilized as an integrated development environment in order to use Python more effectively.
3. Structure of Variable Pitch Screw
The variable pitch structure referred to in this study is defined as a structure having a pitch change in the screw portion and a change in the diameter of the valley.
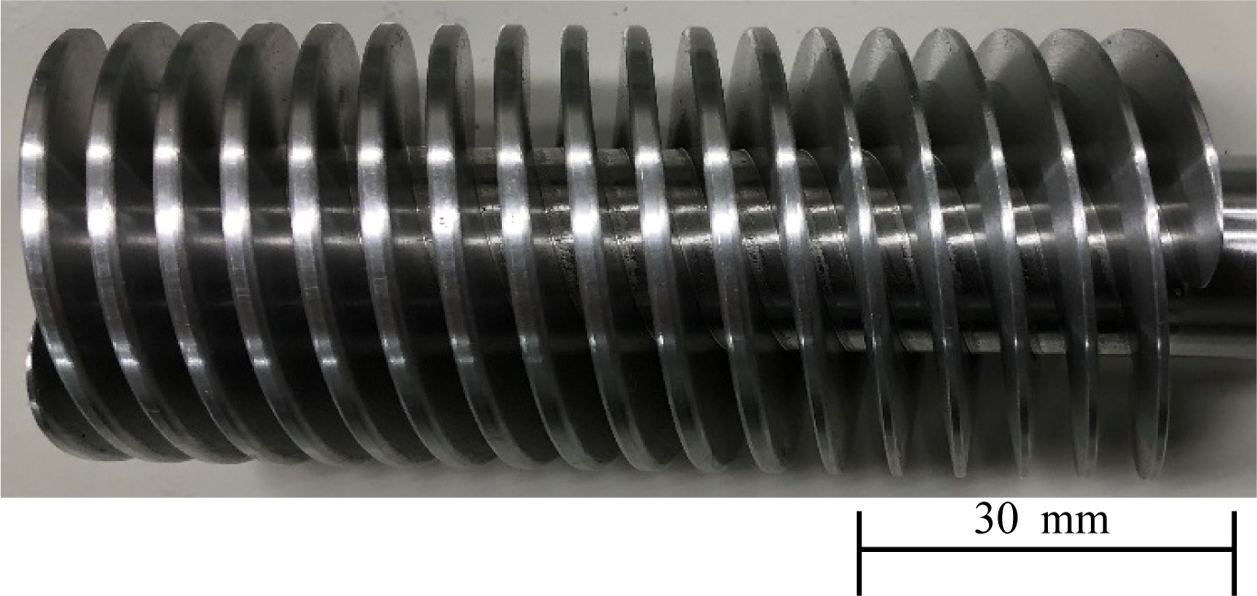
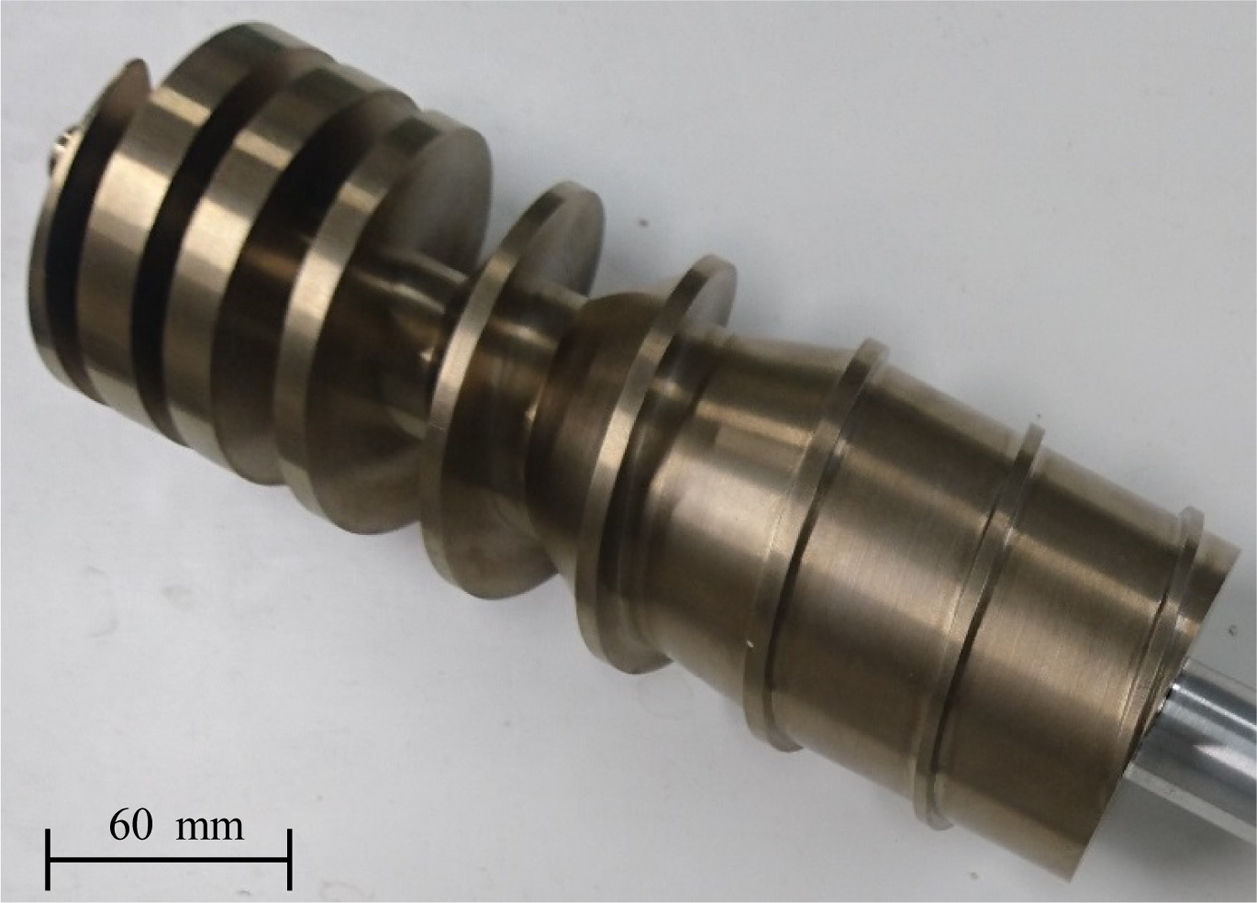
Fig. 1 is a variable pitch screw of the type in which the angle of the screw thread gradually changes. In addition, Fig. 2 shows the maximum diameter 48 mm and the length 284.5 mm, the pitch of the screw gradually increases from the tip to the rear end. In addition, the diameter of the valley gradually increases from the tip to the rear end. This screw is a fairly complicated shape which is inclined to the thread of the intermediate part.
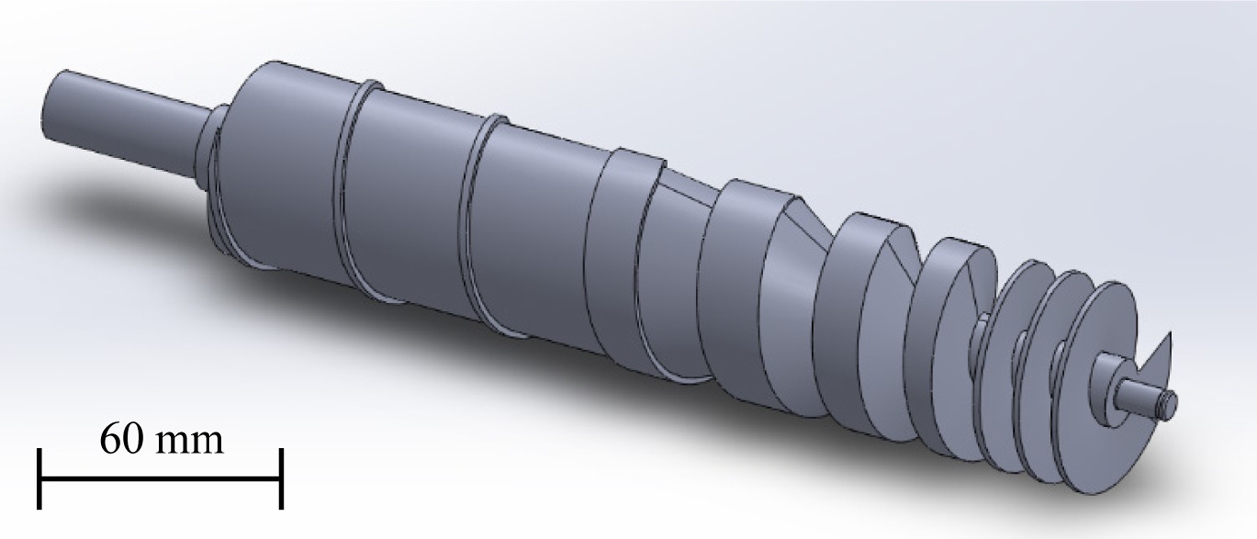
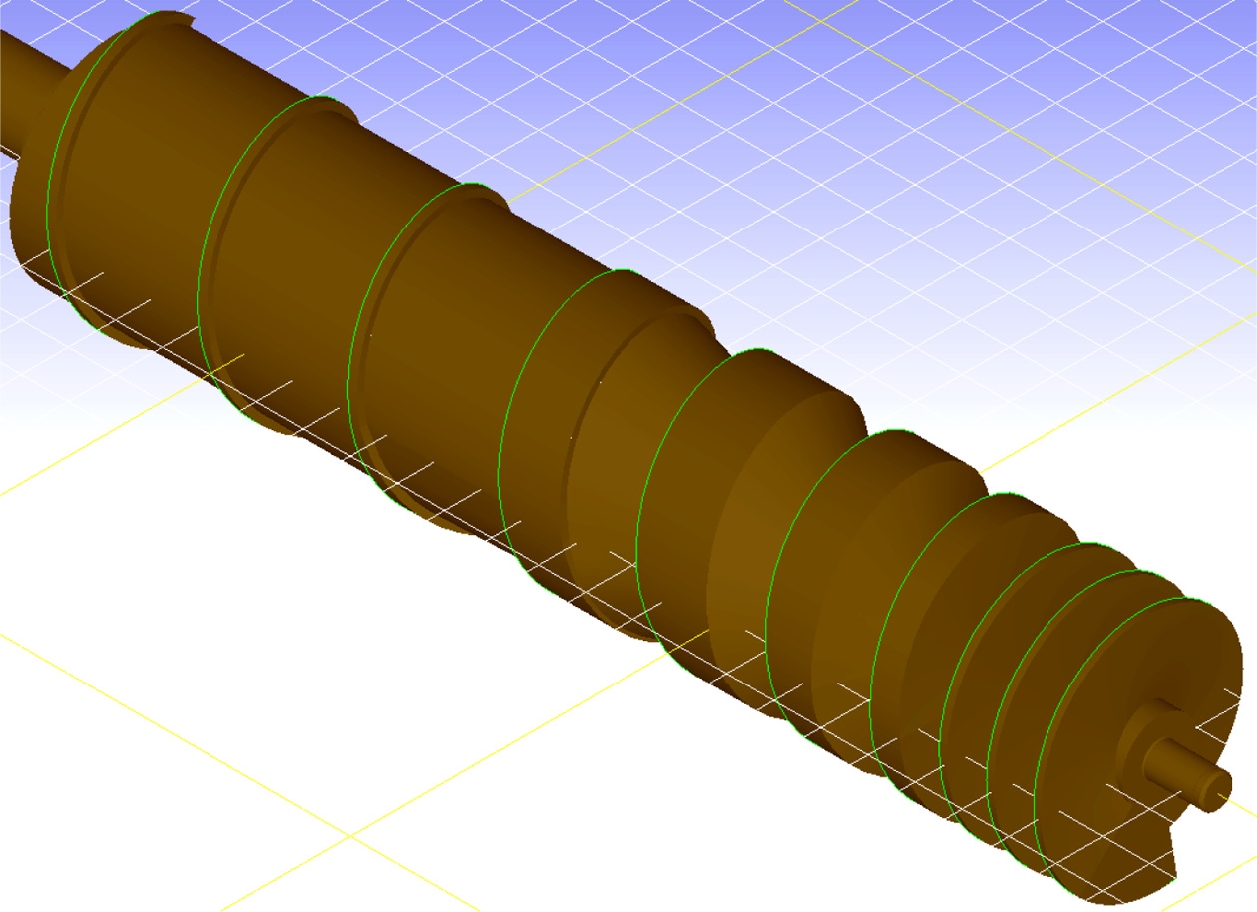
Fig. 3 is a CAD model in which the variable pitch screw of Fig. 2 is represented by Solidworks. In this study, the development is proceeded by using this CAD model and a file that is converted from this CAD model into STEP file.
4. Generation of Tool Paths for Turning
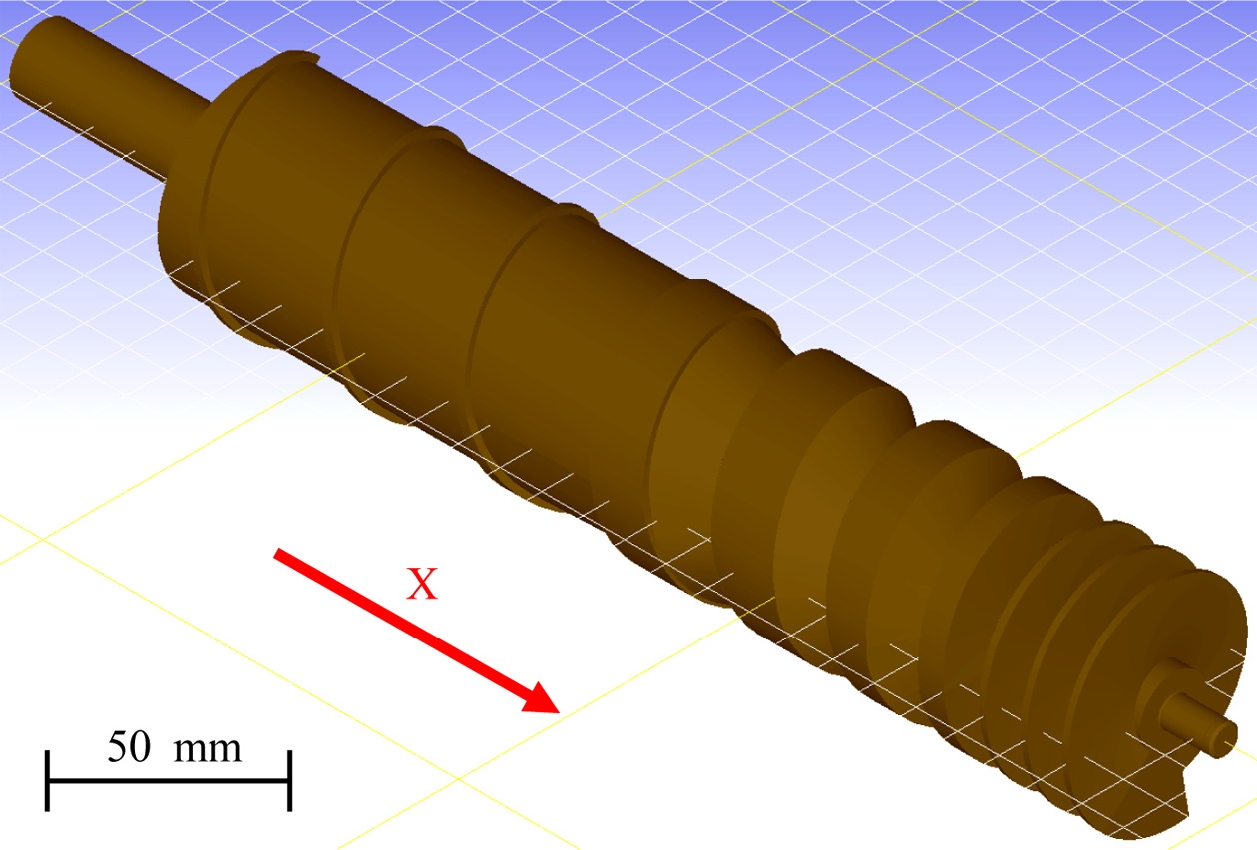
The result of expanding the STEP file of variable pitch screws is shown in Fig. 4, which is used in the subsequent procedures with ChubuCAM.
First, tool path is generated by use of existing modules of ChubuCAM. After beginning with the module, the operator enters the range of the X axis (Axial Direction) which generates the tool route and the number of tool path to be generated (The number dividing the specified X axis range). However, this module has a constraint that the tool path can be generated only vertically with respect to one axial direction in the XYZ axes when generating the tool paths.
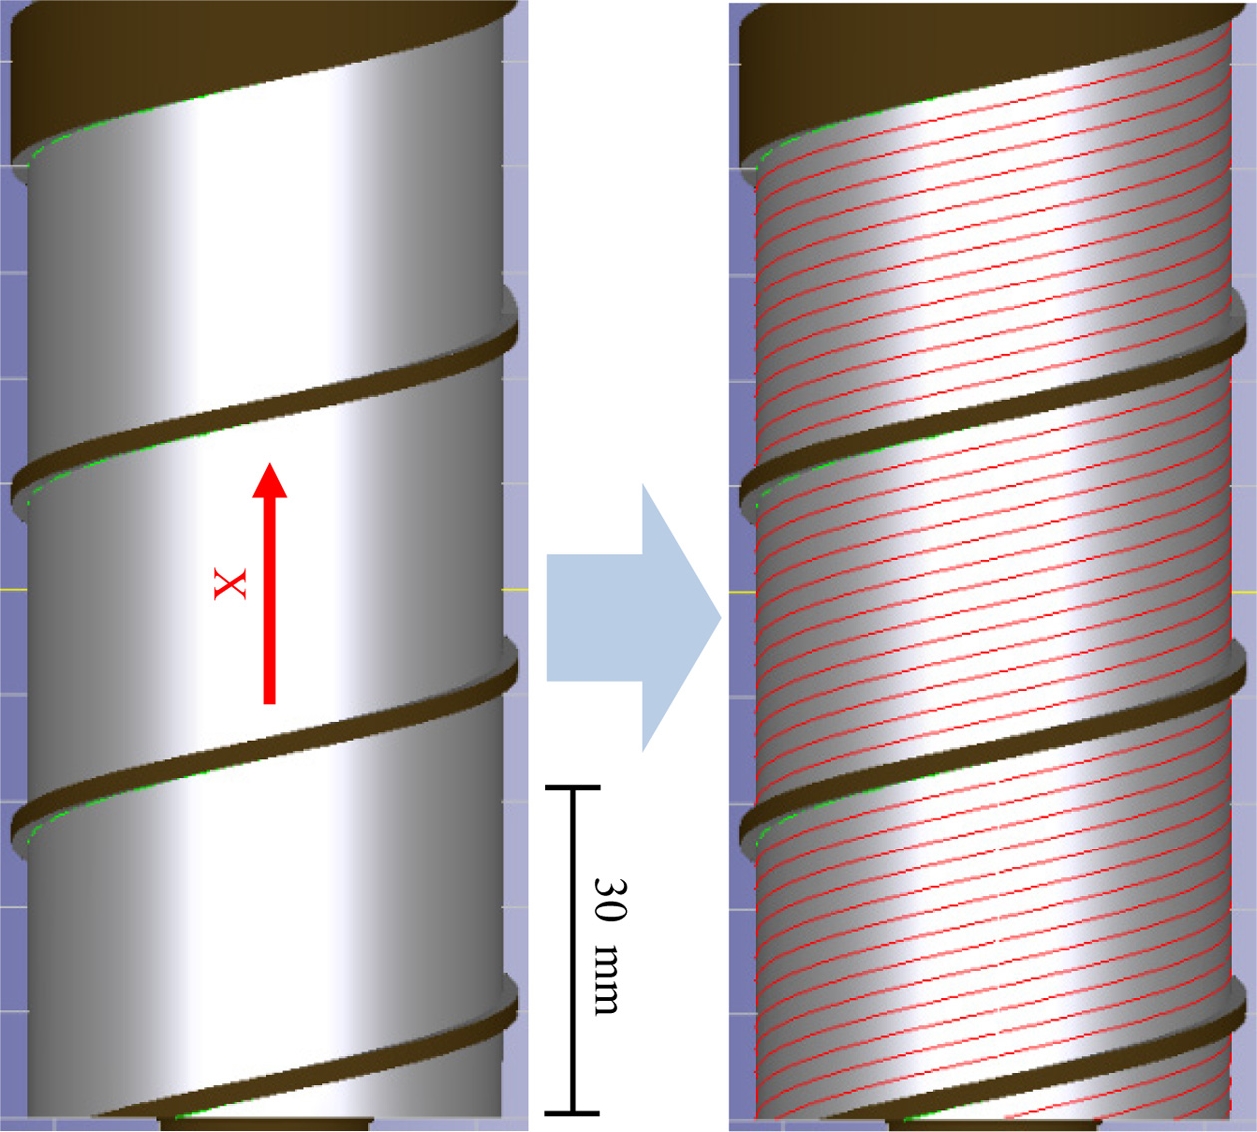
Although the generated tool path is indicated by a line in Fig. 5, it crosses the spiral of the screw, and it is impossible to fabricate a screw as it is.
Therefore, in this study, the operator selects the edge of the screw part of the CAD model being read by ChubuCAM, and uses it as a tool route in duplicating.7 The highlighted line in Fig. 6 is the selected edge. This edge is duplicated and offset in the X axis direction to generate a tool path in the feed direction. The tool path in the depth of cut direction is generated by reducing the magnification of the shape of copied edge in the YZ plane. In addition, since the edge coordinates are saved by use of the array of NumPy modules, this duplicated edge can be saved as it is in a text file. Thereafter, when the work to use the same edge is required, it can read from the saved text file.
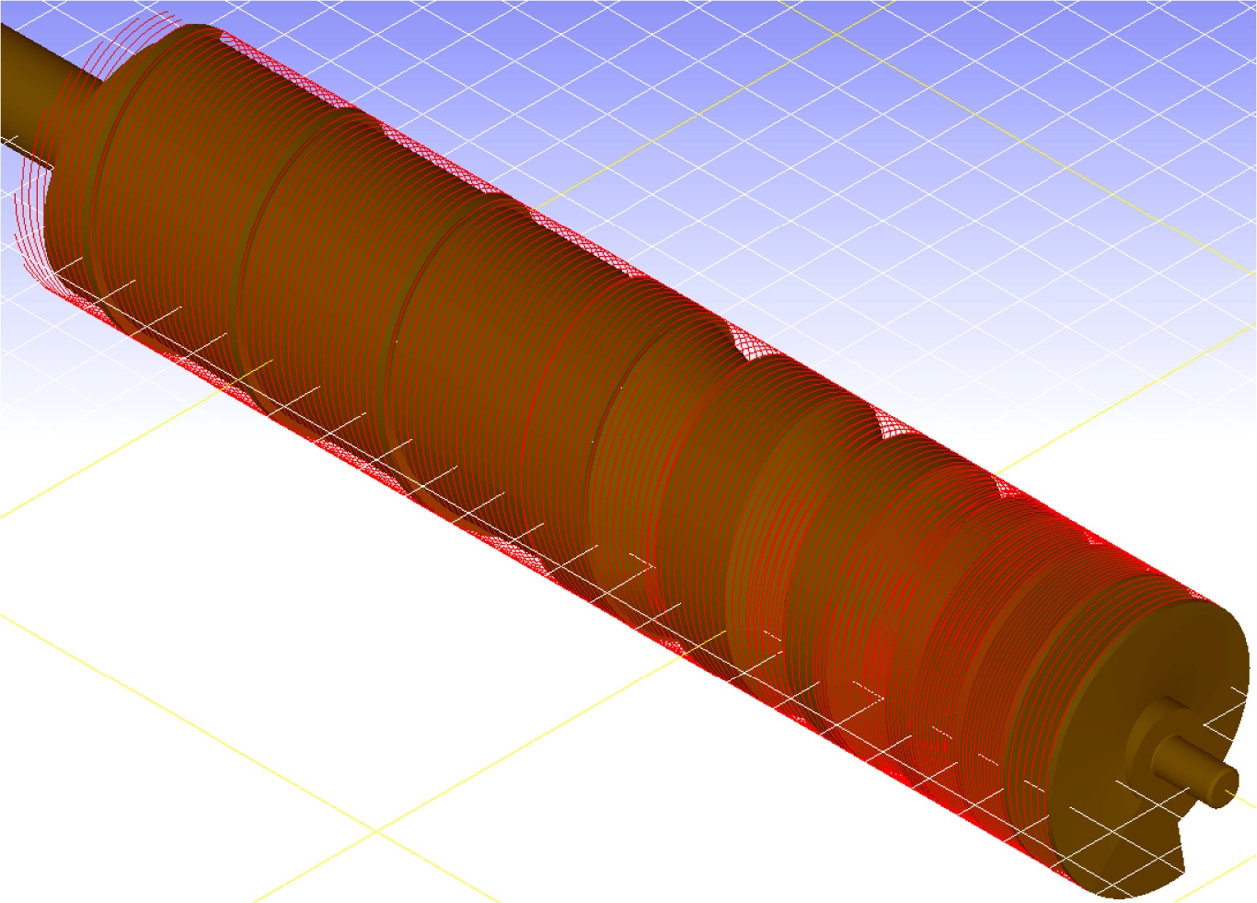
The tool path generation method is modularized, and the tool path generated by use of this module is indicated by the line in Fig. 7. This method is characterized by the fact that tool path can be generated with less operation. As edges are selected and saved to an array in the tool path generation, the required input is only the range to offset the saved edge and the number of copy to be duplicated.
5. Modification of Tool Path Generation
In the tool path generation method described above, there is a possibility of generating a tool path, which interferes with the screw shape. This is because only the shape of the edge and the range that the tool path is generated are taken into account, and the screw shape is not taken into account. Here, a method for modifying the tool path is described according to the target shape to be machined.
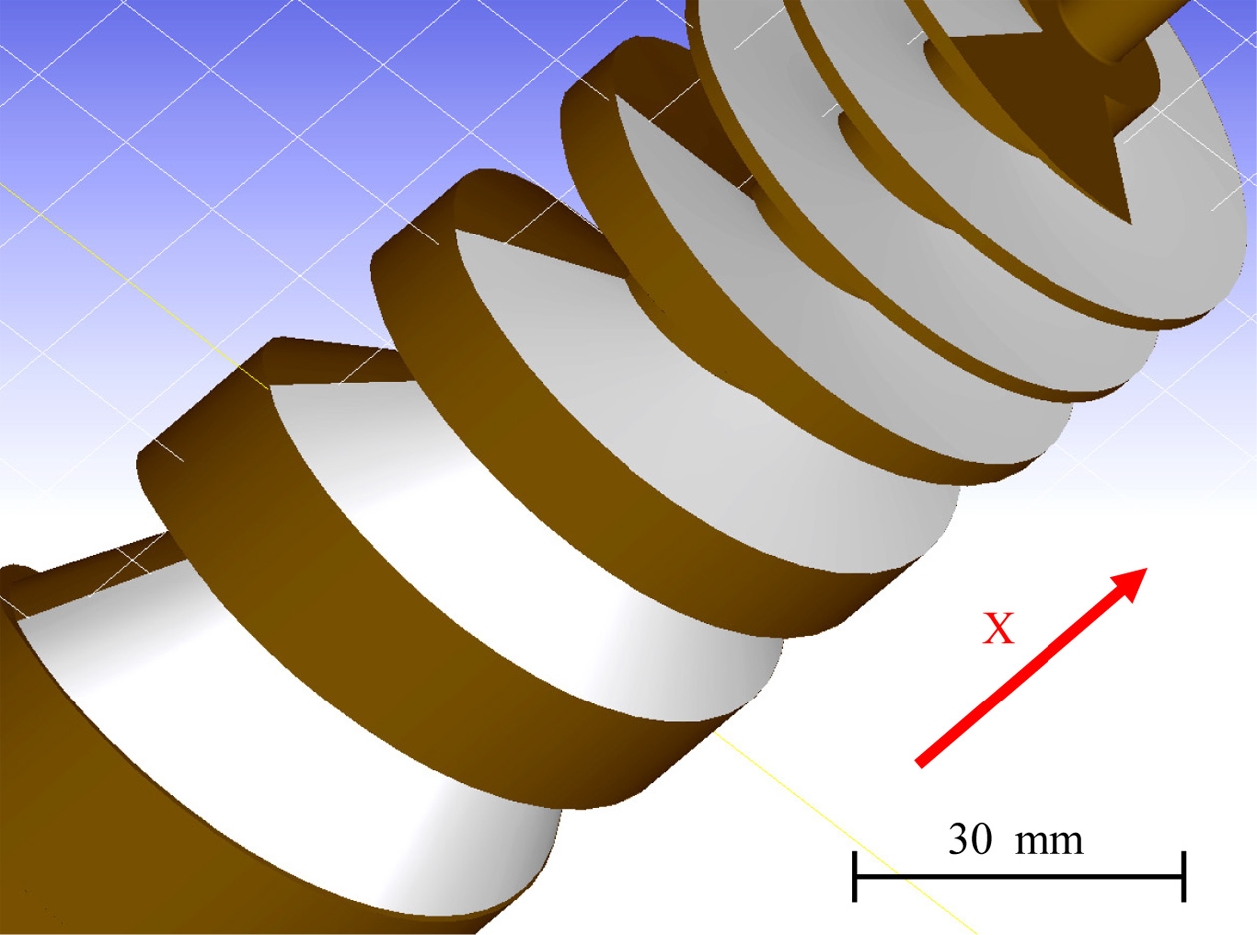
The line in Fig. 8 is the tool path generated in the previous section. This is subjected to the tool path modification process, and the interference portion is recognized and automatically removed.8-10 In this tool path modification processing, the tool shape to be used can be arbitrarily defined. By specifying the position of the vertices and the thickness of the tool, the tool shape can be defined with reference to the tool defined by Python source code.
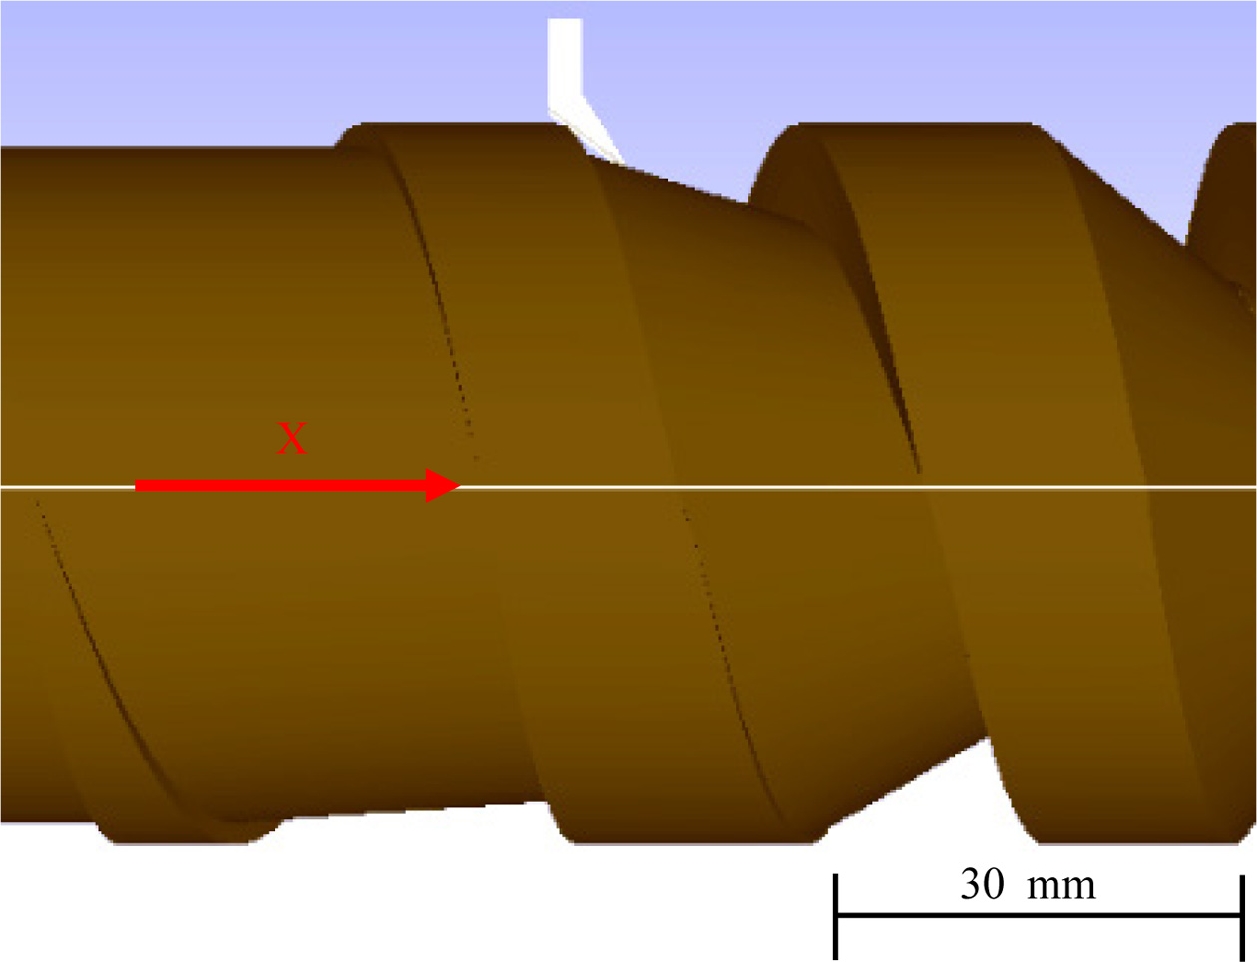
The defined tool is shown by white color in Fig. 9 in accordance with the tool path generation of the variable pitch screw.
When the collision with the defined tool model shape is recognized, the collisions part is automatically eliminated.11
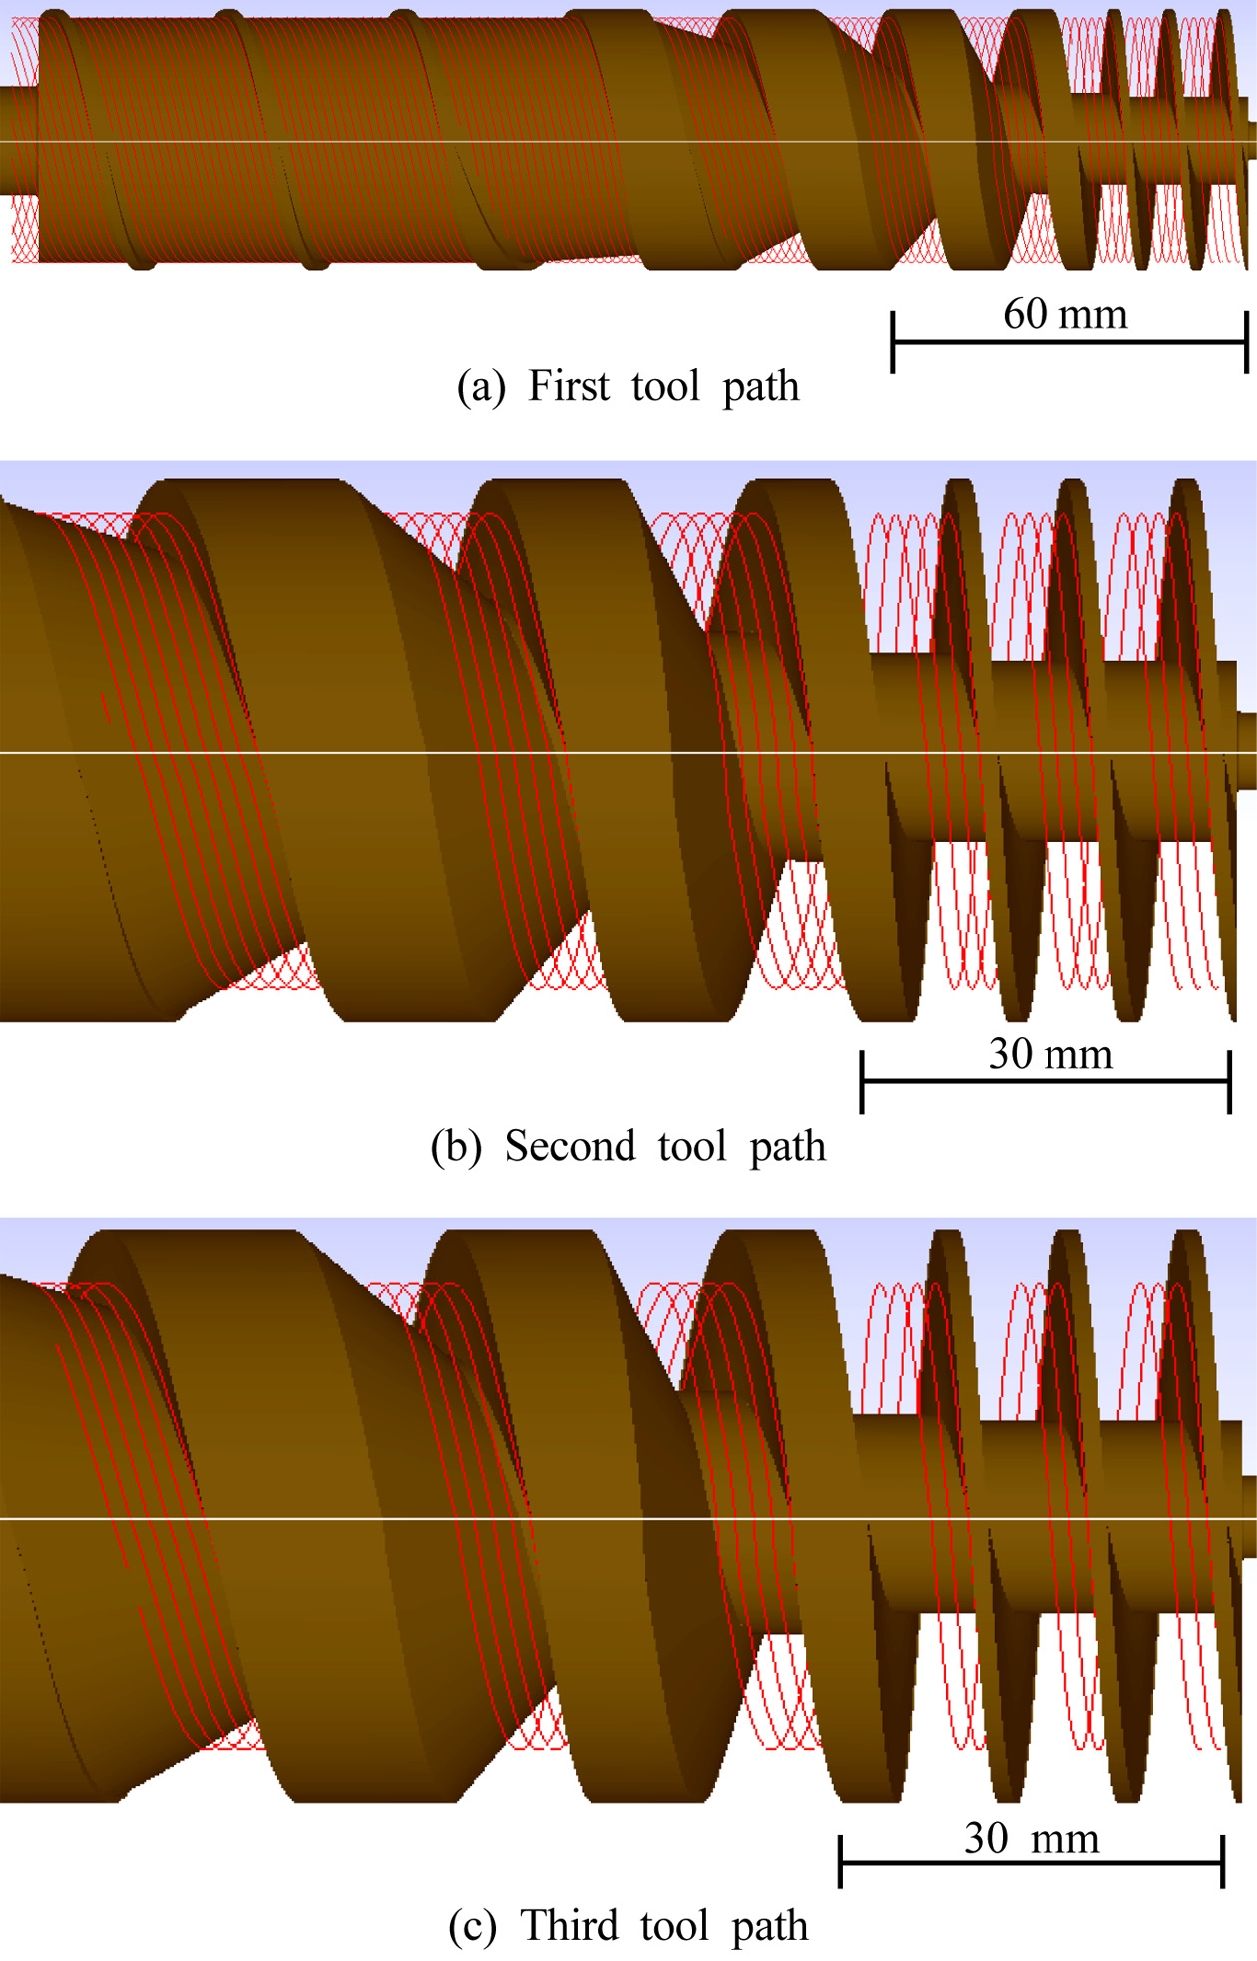
Fig. 10(a) shows the first tool path modified by takin account of the interference between the tool and the workpiece. Fig. 10(b) shows a tool path generated by further cutting 3 mm from the previous tool path. Similarly, the tool path cut further by 3 mm is shown in Fig. 10(c).
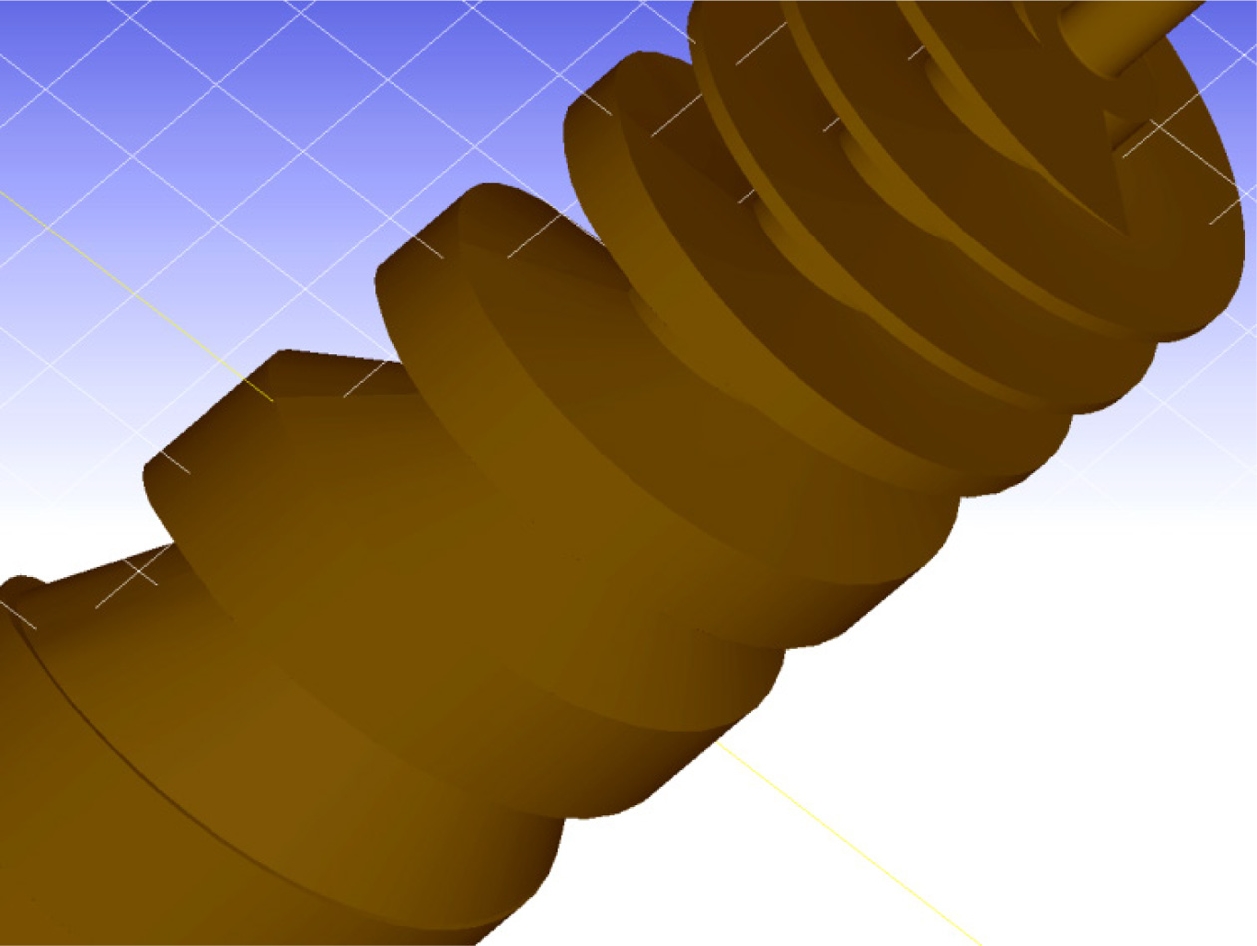
The reason for limiting the tool path to be removed to a certain length or more during the tool path modification process is not to erroneously remove the collision at the joint between features of the 3D-CAD model. The collision at the seam between these features is attributable to line rarely occurring during shape synthesis in CAD. Fig. 11 shows color-coded adjacent features, in order to make it easier to understand the division situation of the feature of the CAD model of the variable pitch screw. From this, it can be seen that there is a line in the divided part of the feature, as shown in Fig. 12. Collision may be detected at near this parting line. Since there is no line in the target screw shape, only the tool path near the parting line, where the collision is detected in a certain length or more, is removed so as not to remove this portion. The problem of collision at the seam of this feature is due to CAD software.
In the variable pitch screw, there is a portion inclined with respect to the tool insertion angle at the portion where the pitch changes. Also, depending on the screw, it is required to provide R to the tooth bottom. In order to adapt to those parts, a program is prepared that modifies the generated tool path considering the tool nose radius.
6. Experimental Result
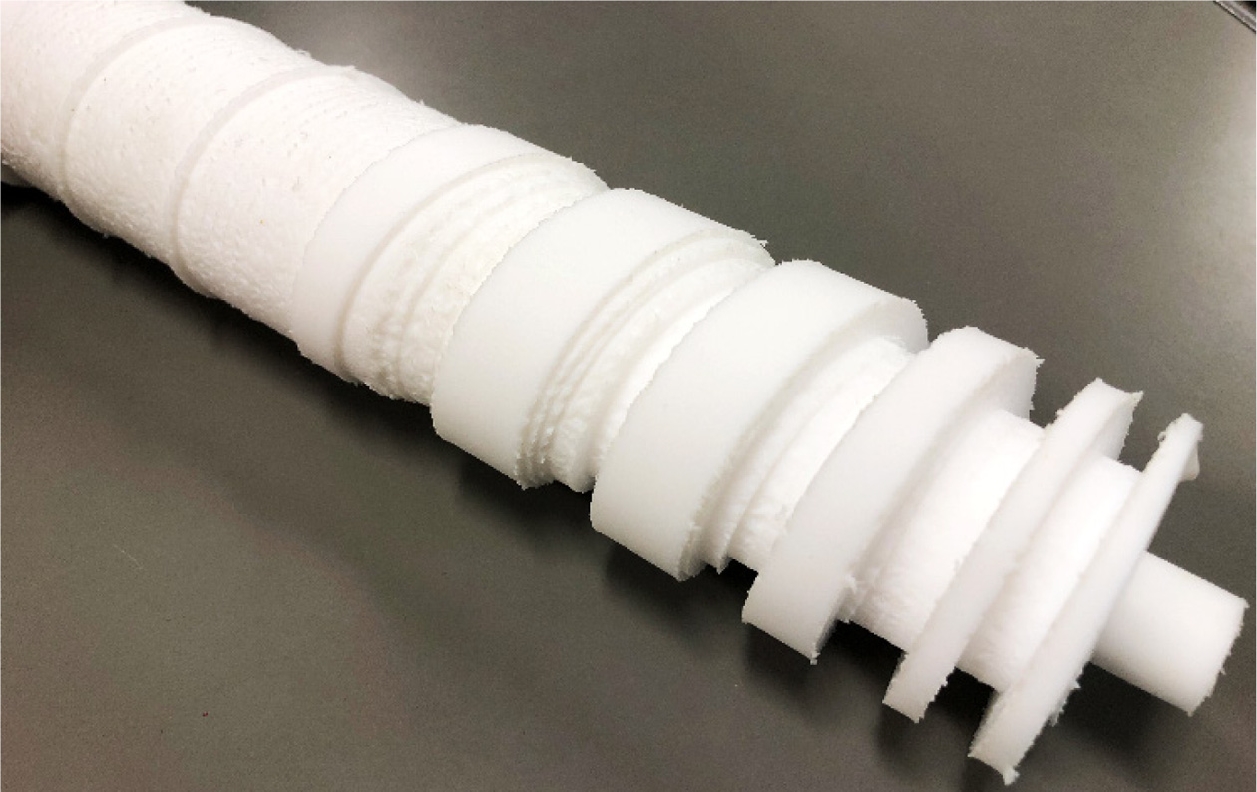
Machining experiment was conducted by use of the generated tool path explained in Fig. 10. The machined result of the variable pitch screw is shown in Fig. 13.
In the experiment, Teflon is used as a material. As the cutting condition, the depth of cut is set to be 1 mm, and the tool width is 3 mm. Although the tapered part of the screw was not well machined due to the improper cutting condition, it is seen that the screw shape is fabricated. The total machining time was 12 minutes, and was shortened to about 20%, compared with the milling operation of the same shape with the same material.
7. Concluding Remark
CAM system specialized for variable pitch screw fabrication by use of turning operation was developed, while omitting to give many parameters to CAM system. As a result, it is found that the developed CAM software has the potential of fabricating variable pitch screws easily, with a few input data provided.
Acknowledgments
The authors would like to express their sincere gratitude to Kondo Precision Co., Ltd. for its kind cooperation in this research.
References
- Kanamaru, M., “Examples and Tasks of Simultaneous 5-Axis Machining,” Proc. of the Machine Tool Related Engineer’s Conference on Japan Management Association, pp.1-6, 2005.
-
AMM, S. U., Sato, M., Watanabe, M., and Rashid, M. M., “Integrating CAD, TRIZ, and Customer Needs,” International Journal of Automation Technology, Vol. 10, No. 2, pp. 132-143, 2016.
[https://doi.org/10.20965/ijat.2016.p0132]

-
Nakamoto, K. and Takeuchi, Y., “Recent Advances in Multiaxis Control and Multitasking Machining,” International Journal of Automation Technology, Vol. 11, No. 2, pp. 140-154, 2017.
[https://doi.org/10.20965/ijat.2017.p0140]

-
Otani, S., Nakamoto, T., Ishida, T., and Takeuchi, Y., “Study on CAM System for Multi-Task Machine,” Transactions of the Japan Society of Mechanical Engineers, Vol. 75, No. 757, pp. 2589-2594, 2009.
[https://doi.org/10.1299/kikaic.75.2589]

-
Gao, T., Zhang, W., Qiu, K., and Wan, M., “Numerical Simulation of Machined Surface Topography and Roughness in Milling Process,” Journal of Manufacturing Science Engineering, Vol. 128, pp. 96-103, 2006.
[https://doi.org/10.1115/1.2123047]

- McKinney, W., “Introduction to Data Analysis by Python-Data Processing Using NumPy, Pandas,” O’Reilly Japan Inc., 2013. (in Japanese)
-
Muller, M., Erdos, G., and Xirouchakis, P., “High Accuracy Spline Interpolation for 5-Axis Machining,” Computer-Aided Design, Vol. 36, No. 13, pp. 1379-1393, 2004.
[https://doi.org/10.1016/j.cad.2004.02.007]

-
Mir, Y., Mayer, J., and Fortin, C., “Tool Path Error Prediction of a Five-Axis Machine Tool with Geometric Errors,” Proceedings of the Institution of Mechanical Engineers, Part B: Journal of Engineering Manufacture, Vol. 216, No. 5, pp. 697-712, 2002.
[https://doi.org/10.1243/0954405021520391]

-
Cai, Y. and Xi, G., “Global Tool Interference Detection in Five-Axis Machining of Sculptured Surfaces,” Proceedings of the Institution of Mechanical Engineers, Part B: Journal of Engineering Manufacture, Vol. 216, No. 10, pp. 1345-1353, 2002.
[https://doi.org/10.1243/095440502320405430]

-
Tutunea-Fatan, O. R. and Feng, H. Y., “Determination of Geometry-Based Errors for Interpolated Tool Paths in Five-Axis Surface Machining,” Journal of Manufacturing Science Engineering, Vol. 127, No. 1, pp. 60-67, 2005.
[https://doi.org/10.1115/1.1831285]

-
Ding, S., Mannan, M., and Poo, A. N., “Oriented Bounding Box and Octree Based Global Interference Detection in 5-Axis Machining of Free-Form Surfaces,” Computer-Aided Design, Vol. 36, No. 13, pp. 1281-1294, 2004.
[https://doi.org/10.1016/S0010-4485(03)00109-X]


M.E. candidate in the Department of Mechanical Engineering, Chubu University. His research interest is CAM for Multi-tasking Machine Tool.
E-mail: tm18006-0133@sti.chubu.ac.jp

Senior researcher in Zeeko Co. His research interest is CAM system development.
E-mail: samyak.jain@zeeko.co.uk

Associate Professor in the Department of Mechanical Engineering, Kyoto University. His research interest is Multi-axis Control Polishing.
E-mail: beaucamp@me.kyoto-u.ac.jp

Professor in the Department of Mechanical Engineering, Chubu University. His research interest is Multi-axis Control of Machine Tool.
E-mail: takeuchi_yoshimi@isc.chubu.ac.jp

